Are you really okay with fumbling around inside RankerX while your competition stamps out links like a machine that actually knows what it’s doing?
A lot of people treat SEO tools like a cockpit full of blinking buttons. They click random tabs, ignore the boring setup, pray to the algorithm gods, and then act shocked when the campaign turns into expensive crap. That approach is as effective as a screen door on a submarine.
RankerX is simple enough to start quickly, but it is also advanced enough to do real work when you set it up properly. That is the sweet spot. You do not need a massive technical ritual, and you do not need to waste hours poking through menus like you are defusing a bomb. You just need the right order of operations.
This guide walks through the exact workflow for getting a RankerX campaign up and running fast: basic settings, content setup, campaign creation with X Wizard, and where to check the resulting accounts and backlinks. Clean. Practical. No fluff. No mystical nonsense.
If your goal is to launch a usable, structured SEO campaign in RankerX without making rookie mistakes, this is the blueprint.
>> RankerX Review: The Link-Building SEO Software You Need 2026
What RankerX Is Actually Doing for You
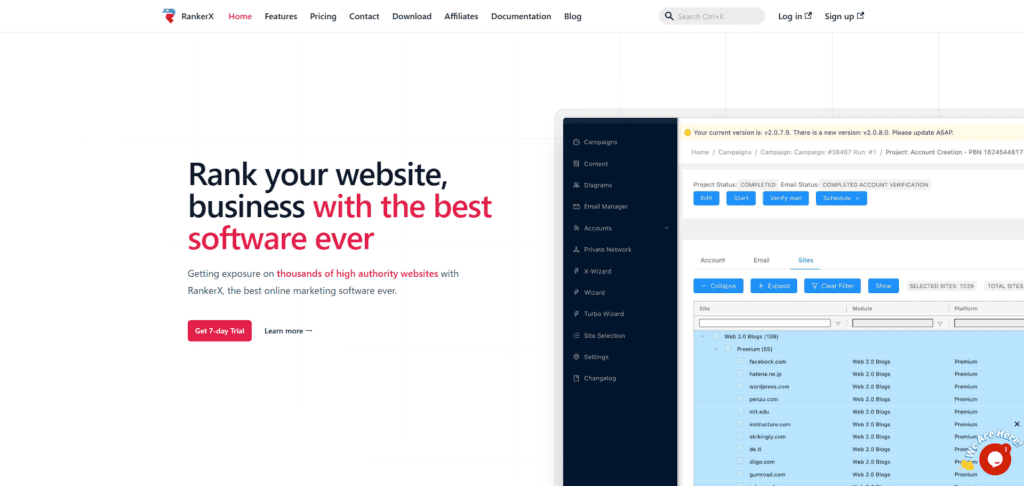
At its core, RankerX is a link building tool. Not just a bare-bones submitter, and not some cartoonishly overcomplicated monstrosity either. It helps you create campaigns across multiple sites, organize those campaigns into tiers, manage content, generate or use accounts, and keep track of the backlinks created.
The real power comes from structure.
Instead of manually juggling every site, article, keyword, and account like a clown with a caffeine problem, RankerX lets you build campaigns around a strategy. That strategy can include tiered links, anchor variations, article placement rules, email handling, and scheduling.
That is why setup matters. If you skip the foundation, the campaign may still run, but it will run like a shopping cart with a broken wheel.
The Fast Workflow for a Solid RankerX Campaign
The process breaks down into four parts:
Prepare the basic software settings
Add content for the campaign
Create a new campaign with X Wizard
Review accounts and backlinks after creation
Follow that sequence and RankerX stops feeling chaotic. Ignore it and you will be wandering around the interface wondering why your campaign is held together with digital duct tape.
Step 1: Set Up RankerX Before You Touch a Campaign
Before creating anything, handle the basic settings that affect campaign performance.
Proxies: Optional, But Not Pointless
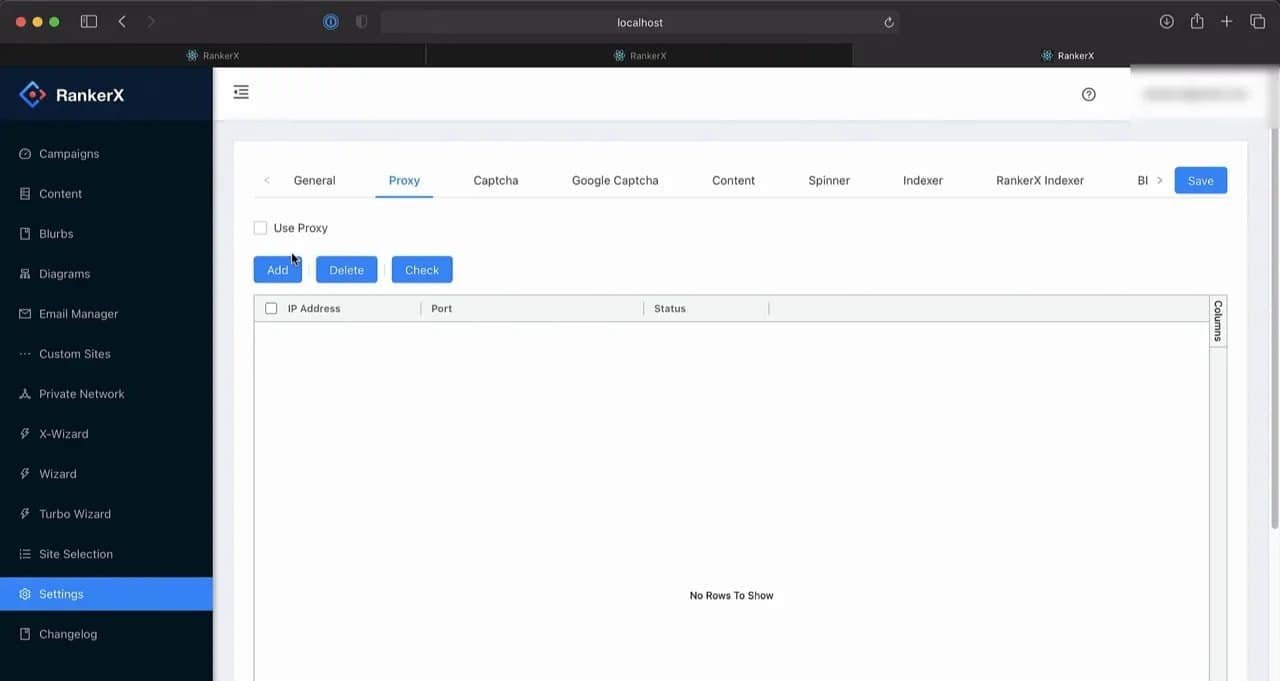
Go to Settings and open the Proxies tab.
Here is the honest answer: proxies in RankerX are optional.
You can run campaigns without them, and for smaller jobs that may be perfectly fine. But if you plan to create a lot of links, and you care about success rates and the longevity of those backlinks, using proxies is the smarter move.
Think of it this way. Running heavy campaigns without proxies is like trying to sneak through a building while wearing tap shoes. Technically possible. Not exactly elegant.
After adding proxies, check them. RankerX includes a check button for a reason. Bad proxies are dead weight, and dead weight in SEO automation has a special talent for wasting your time while pretending to be useful.
Once your proxies are added and verified:
Enable Use Proxy
Click Save
That is it. No ceremony. Just make sure the setting is actually turned on.
CAPTCHA Solving: Because the Internet Hates Bots
A lot of sites supported inside RankerX use CAPTCHAs. That means if you do not have a CAPTCHA-solving method in place, your campaigns will hit unnecessary friction fast.
Use either:
A CAPTCHA-solving service
A CAPTCHA-solving software
For a simple starting setup, a CAPTCHA service is the easiest route.
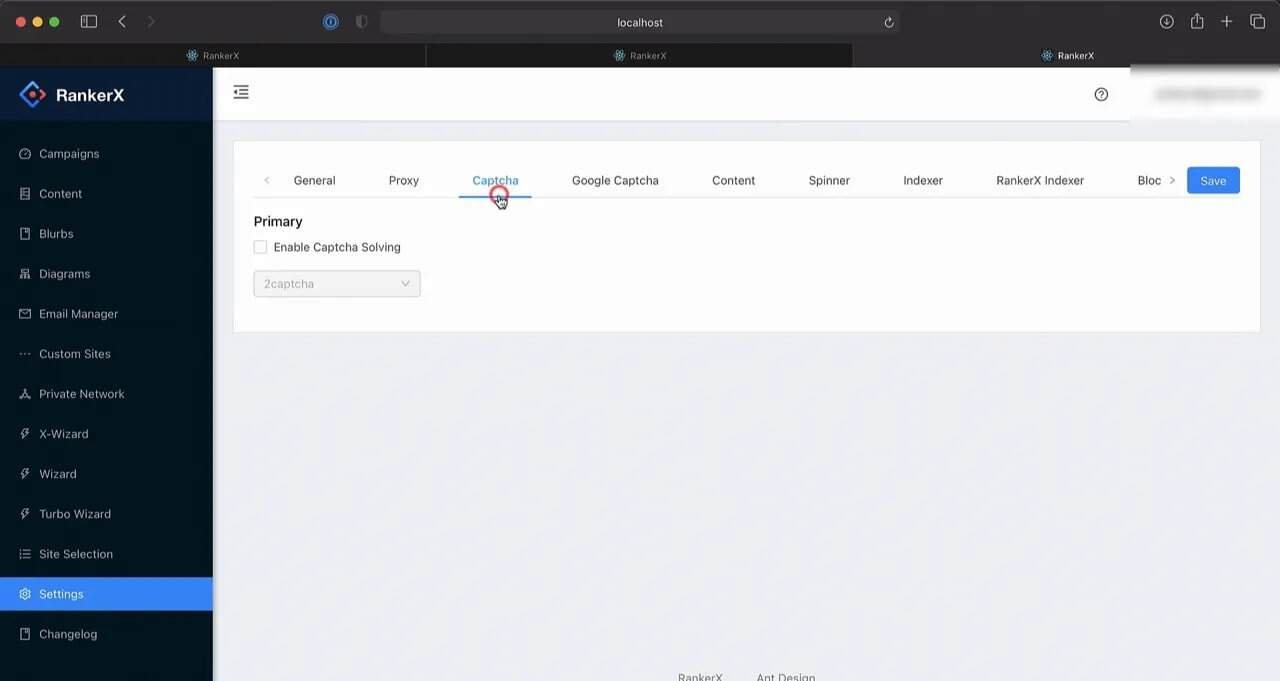
Enter your CAPTCHA service details in the appropriate settings area, then hit Save. That one step removes a lot of avoidable campaign failure.
This is one of those boring preparations people love to skip because it is not “the exciting part.” Then they wonder why the campaign stalls out. Revolutionary insight here: if a website asks for a CAPTCHA and your tool cannot solve it, the tool is not the problem. Your setup is.
Step 2: Add Content RankerX Can Use
Once the global settings are in place, move to content.
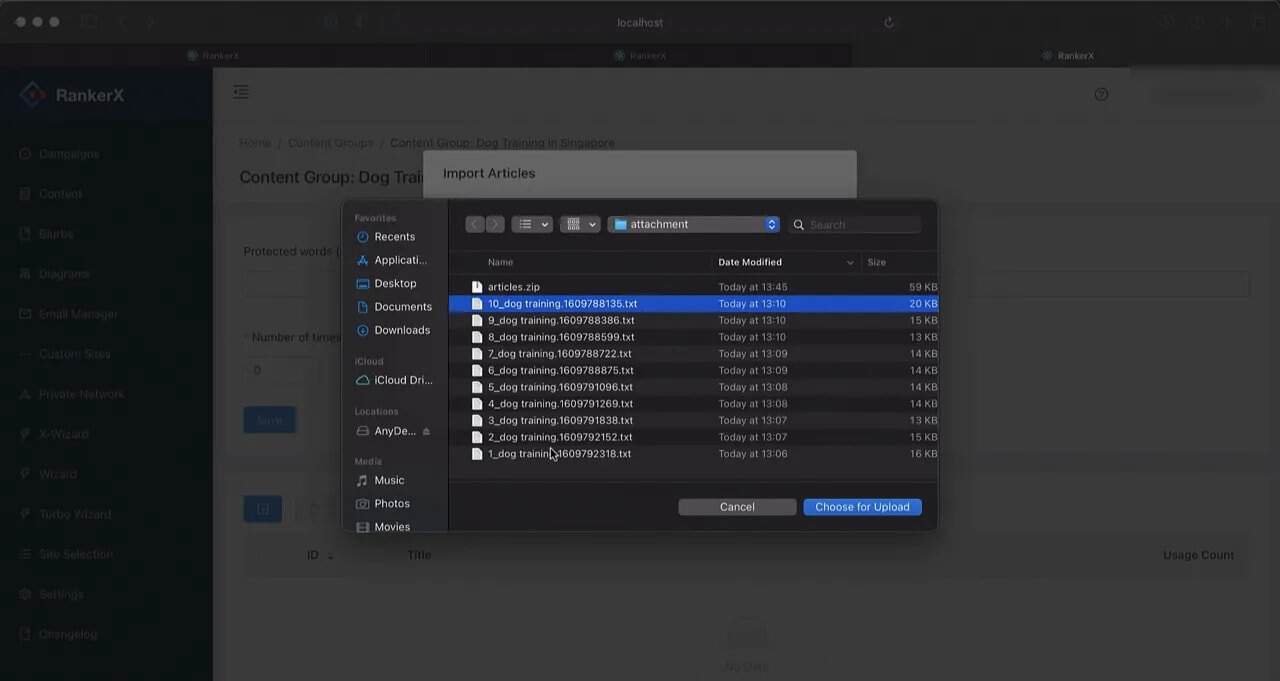
Go to Content Group and create a new content group.

This is where RankerX pulls articles for your campaign. If your content setup is sloppy, everything downstream gets sloppy too.
Your Content Options in RankerX
RankerX gives you several ways to add articles:
Create new articles from scratch with the built-in Article Builder
Use external services such as Article Forge
Upload your own pre-written articles
If you already have content ready, uploading it is the fastest route.
Select your files and upload them into the content group. If you have a large number of article files, compress them into a ZIP file and upload that instead. RankerX supports that workflow, which is nice because nobody wants to upload fifty files one by one like it is 2007.
The key point is simple: make sure the content exists before campaign creation. Do not build the campaign first and then scramble for articles afterward. That is backwards, and backwards workflows produce backwards results.
Step 3: Create a New RankerX Campaign with X Wizard
Now the fun part.
Go to the Campaigns page and create a new campaign.
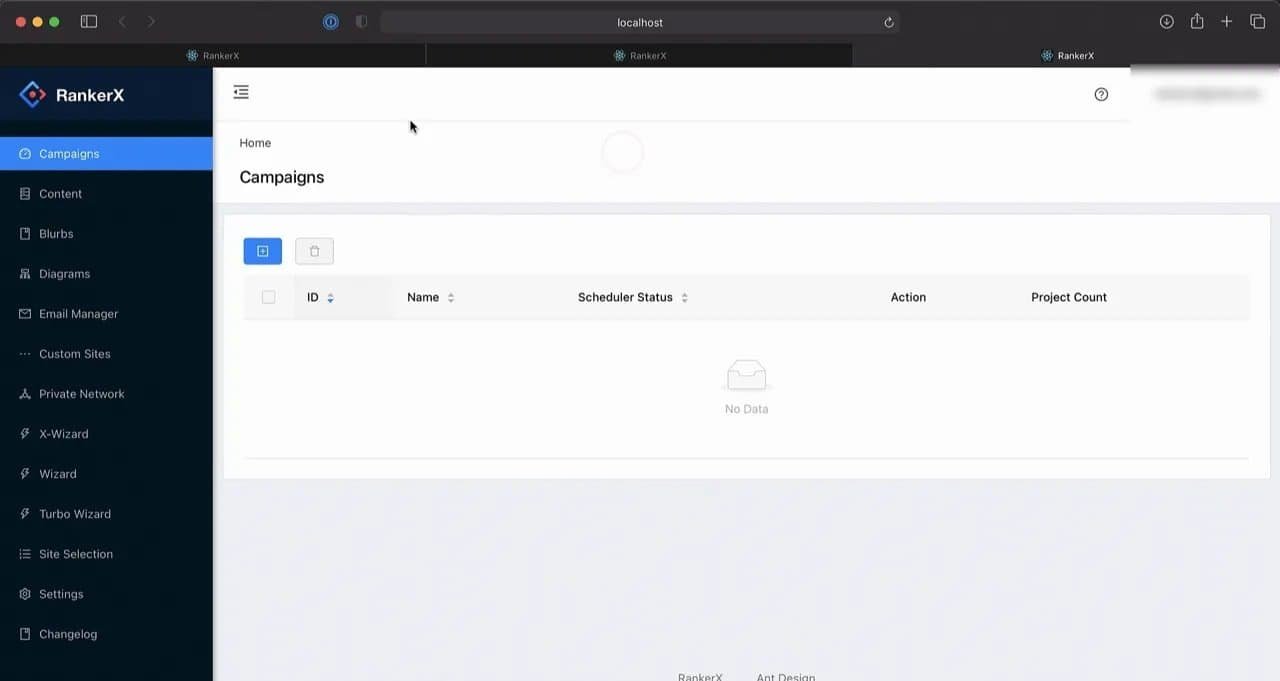
You will need to enter a campaign name, and then you will be given two creation options:
Create the campaign manually
Use X Wizard
For speed and consistency, use X Wizard.
X Wizard lets you work from a pre-created strategy instead of assembling everything from scratch. Unless you enjoy rebuilding the wheel every time for no good reason, this is the better path.
Choose a Strategy and Understand the Diagram
After selecting a strategy, RankerX shows a snapshot of that strategy and then a diagram on the Strategy tab.

This diagram matters because it defines the link structure of the campaign.
Here is the tier logic:
Tier 1 sites point to your money site
Tier 2 sites point to Tier 1 sites
Additional tiers, if present, continue the same pattern
That visual map tells you exactly how the campaign is built. Each box in the diagram becomes a project inside the campaign later. So if you are not paying attention here, do not act surprised when the project list looks bigger than expected.
Select the Sites You Want to Use
Next, choose the sites for the campaign.
RankerX gives you three basic approaches:
Use all available sites
Use a saved site selection
Choose specific sites manually
A saved site selection is handy when you already have a preferred set of sites and want to reuse that exact choice in future campaigns.
For a simple starter campaign, using all available sites keeps things straightforward. No unnecessary micromanagement. No getting lost in endless toggles. Just move forward.
Step 4: Add Money Sites and Keyword Data
Now you tell RankerX what you are actually trying to promote.
Enter:
Tags
Money sites
Primary keywords
But do not stop there. RankerX also expects keyword variety. That means you should include:
Secondary keywords
Branded keywords
Generic keywords
You can then adjust the percentage distribution for each keyword type.
This is important because a campaign built on only one keyword type is blunt-force nonsense. Search profiles need variation. RankerX gives you the controls to shape that mix, so use them.
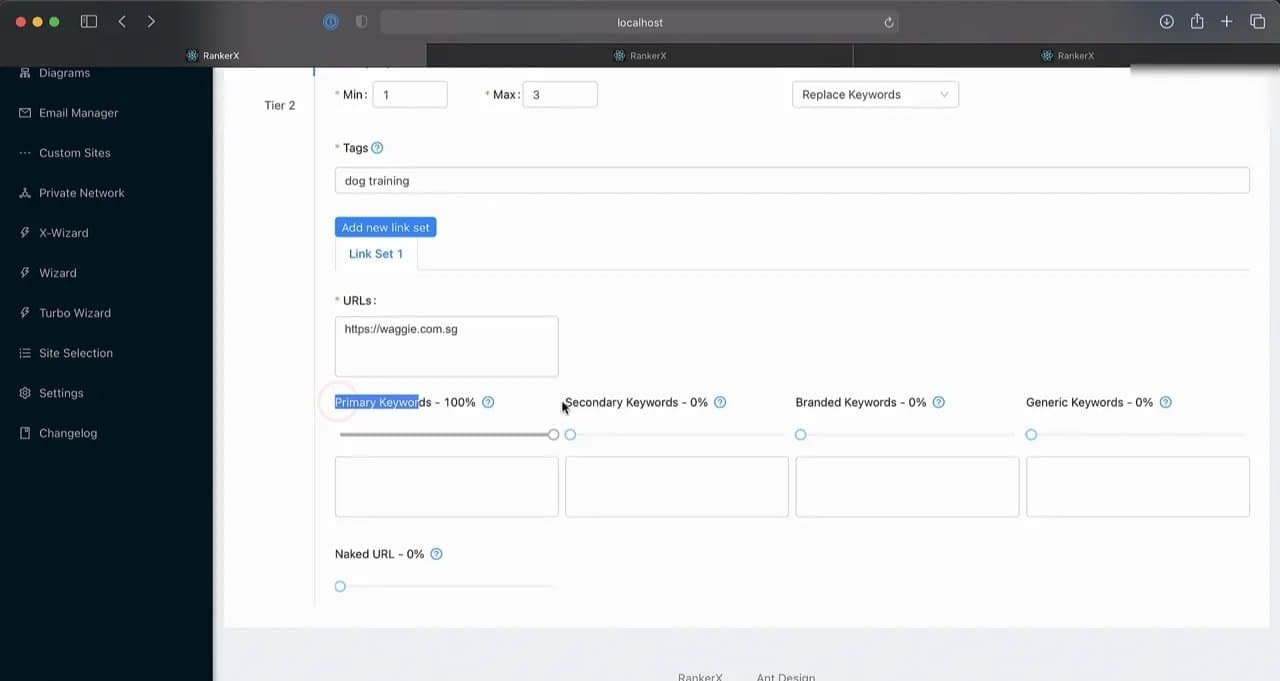
Choose How RankerX Inserts Links Into Content
RankerX also lets you decide where links should be placed in your articles.
There are several placement options available, but a solid default is Replace Keywords.
With this option, RankerX scans your article content, finds the relevant keywords, and inserts the links there.
That keeps the workflow simple and consistent. It is the default for a reason.
Do Not Forget the Second Tier
If the selected strategy includes multiple tiers, you need to configure those tiers too.
In the example setup, the strategy has two tiers. That means the second tier also needs keyword information.
The easy shortcut is to copy the information from Tier 1 to Tier 2. RankerX allows this, and it saves time when you want to keep the setup moving.
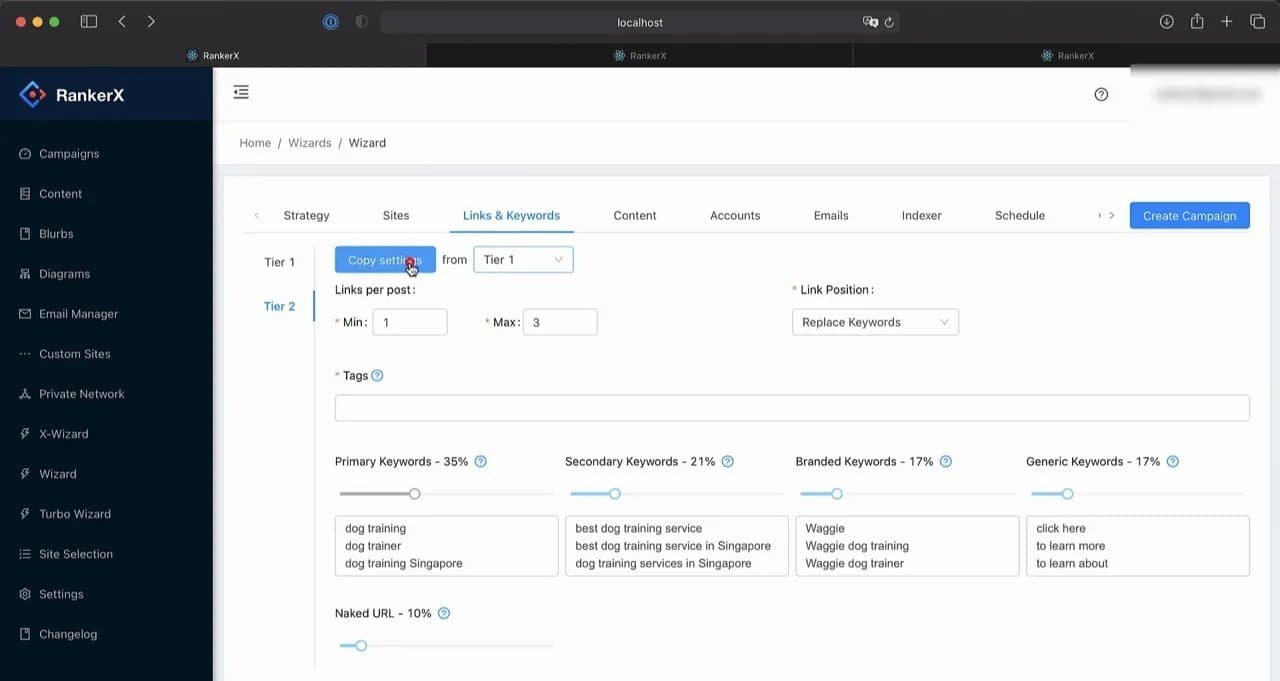
That does not mean every campaign should have identical settings across tiers forever. It just means if your immediate goal is to launch cleanly, copying tier information is a practical way to avoid repetitive input.
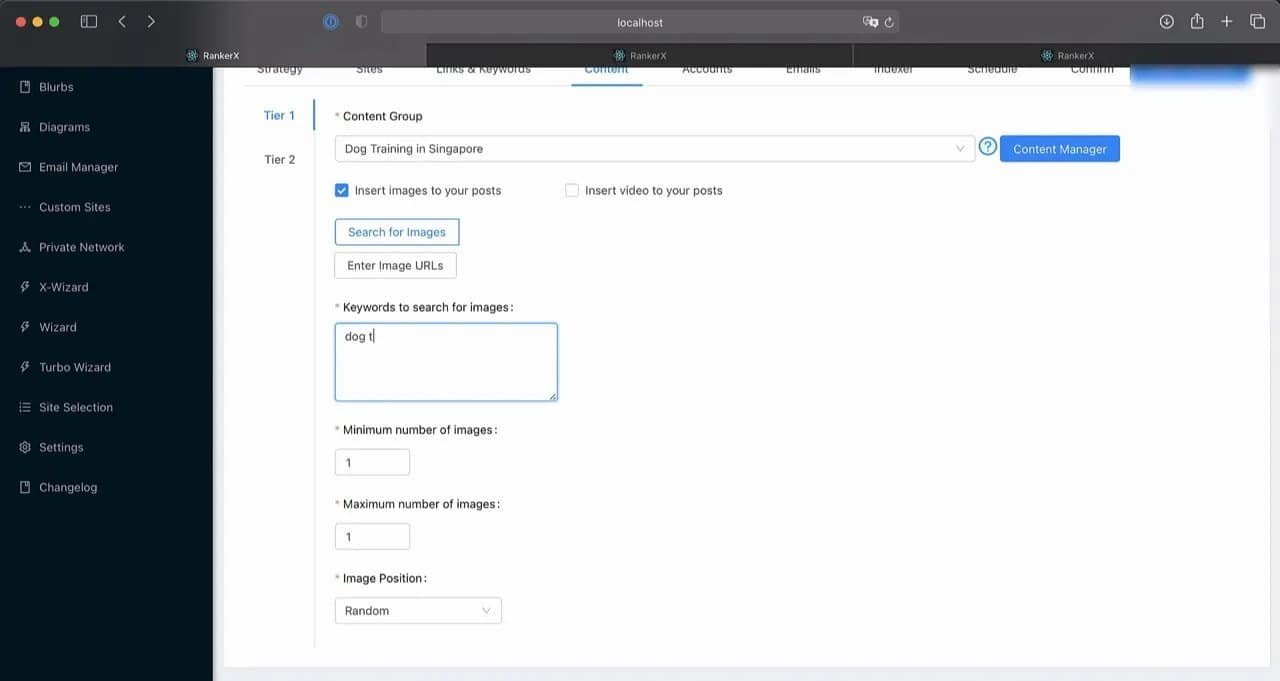
Step 5: Attach the Content Group and Add Images
Head to the Content tab.
Choose the content group you created earlier. This is where RankerX connects your articles to the campaign.
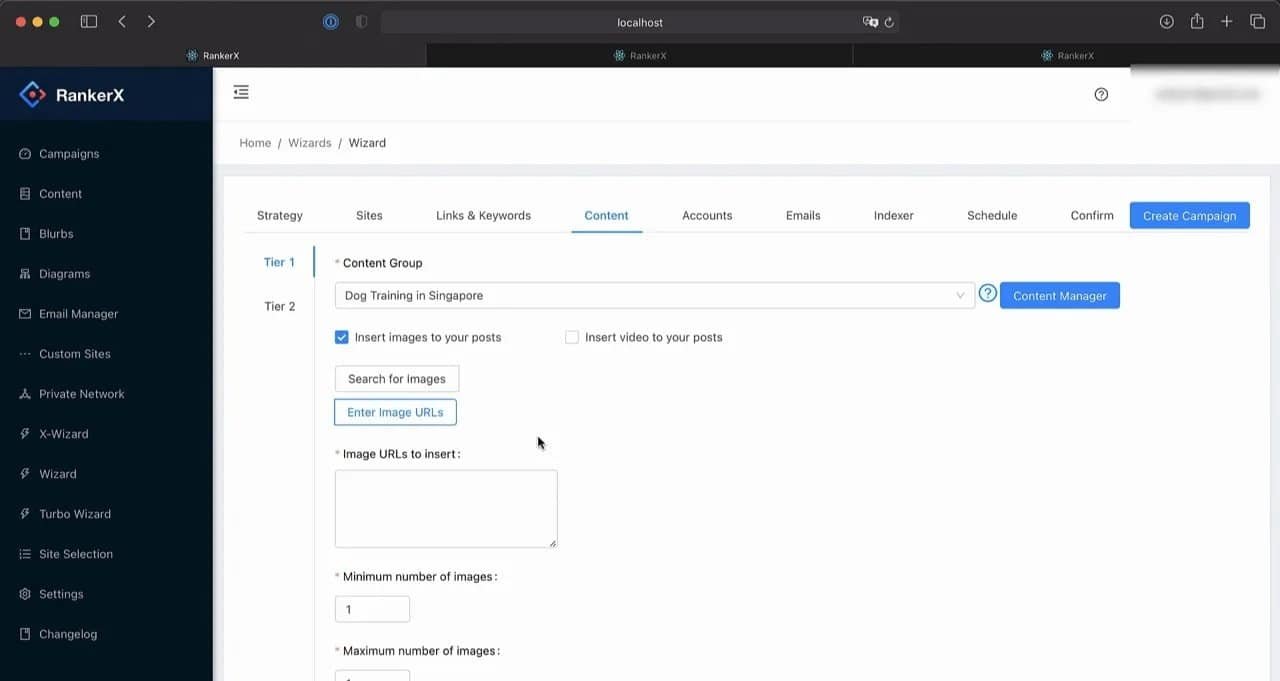
Then add images to the articles.
Yes, images matter in the workflow because RankerX supports them as part of article content, and the setup gives you two ways to provide them:
Enter keywords for RankerX to search for images
Provide the URLs of the images directly
Using keywords is the quicker method in a basic setup, so that is the route to take here.
Enter the image search keywords for the first tier, then do the same for the second tier if your campaign includes one.
Again, this is about building a complete campaign, not a half-finished contraption. Content, links, and supporting media all need to be accounted for.
Step 6: Configure Account Creation Settings
Next, open the Accounts tab.
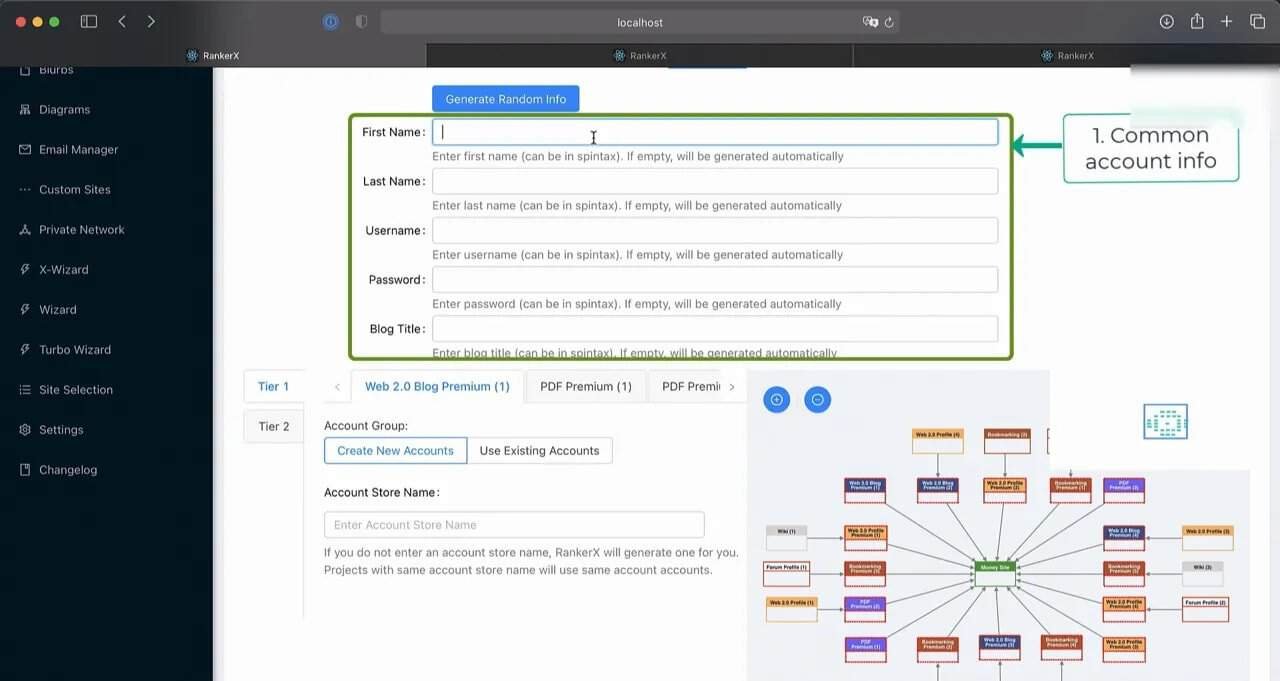
This tab includes three sections, and each one serves a specific purpose.
1. Common Information for New Accounts
This section controls the common information used when RankerX creates new accounts on target websites.
If you leave these fields blank, RankerX will generate the information automatically.
That default behavior is perfectly acceptable for a simple campaign setup.
2. Create New Accounts or Use Existing Ones
The second section lets you choose whether each project should:
Create new accounts
Use existing accounts
This can be adjusted per project inside the campaign structure.
If you are moving quickly and do not need custom account handling, leave it at the default.
3. Campaign Diagram Reference
The third section shows the campaign diagram again.
When you click a block in that diagram, the project selection in the account section changes accordingly. This makes it easier to manage account settings for individual projects without getting lost in the interface.
For a first-pass setup, keeping the defaults across this tab is the simplest move.
There is no prize for overcomplicating account configuration on day one.
Step 7: Choose How RankerX Handles Email Accounts
To create accounts on target websites, RankerX needs email accounts.
Open the Emails tab and choose one of three options:
Enter your email account manually
Use email accounts already added to Email Manager
Use RankerX-provided email accounts
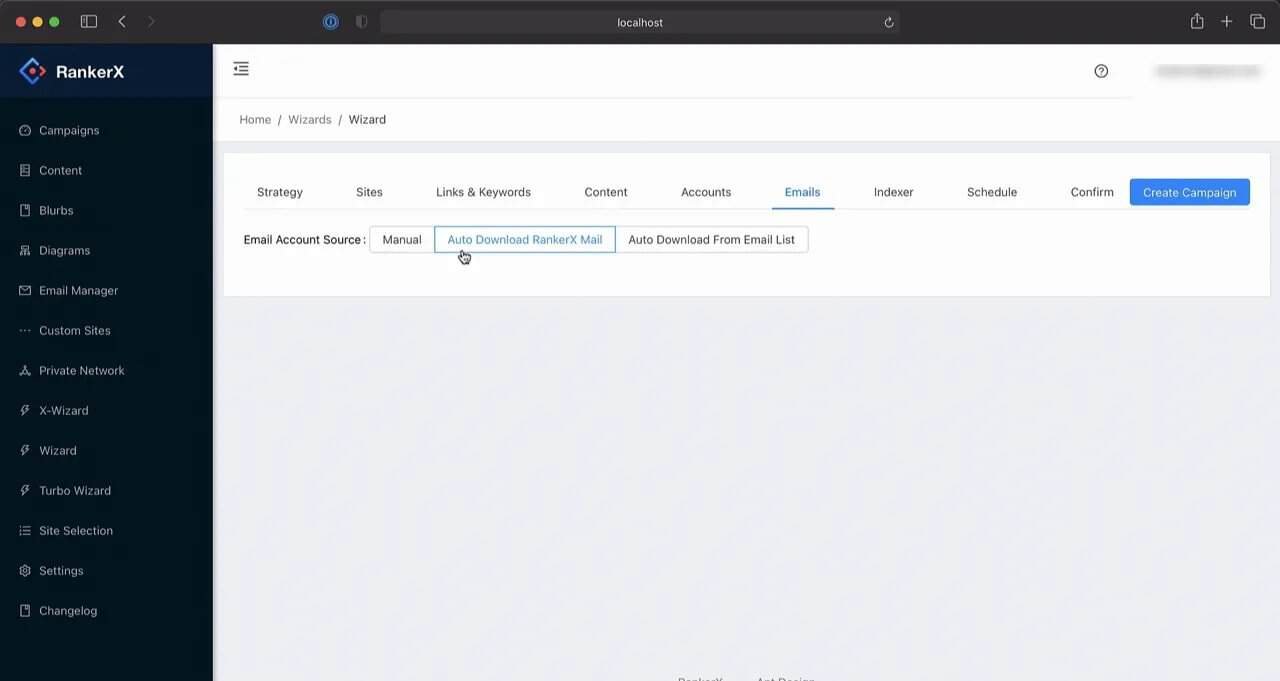
For speed and simplicity, RankerX-provided email accounts are the easiest starting choice.
That keeps the campaign moving without requiring separate email prep first. Later, if you want tighter control over account infrastructure, you can shift to manually managed emails or your saved Email Manager accounts.
But for now, simple wins.
Step 8: Decide Whether to Use an Indexing Service
Then move to the Indexer tab.
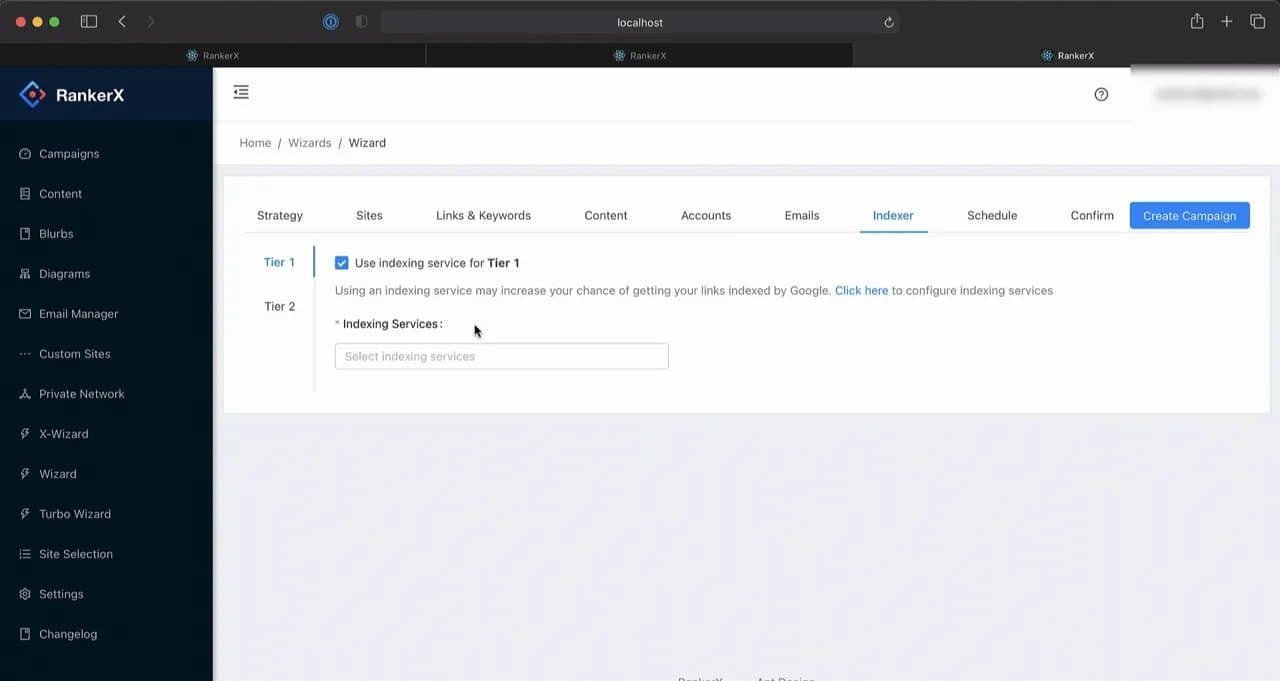
RankerX supports multiple indexing services. If you have access to one, you can enable it here.
The reason this exists is straightforward: using an indexing service may increase the chances that your links are indexed by search engines.
If you are not using an indexing service, just uncheck Use Indexing Service.
That is the clean setup for a beginner campaign. No fake complexity. No pretending every campaign needs every option enabled. Sometimes “off” is the correct choice.
Step 9: Schedule the Campaign Properly
After the indexer settings, choose the campaign schedule.
RankerX lets you specify the date and time for the campaign to run. If you want it to start immediately, choose today.
But there is an important note here for larger jobs: spread bigger campaigns across two to three days.
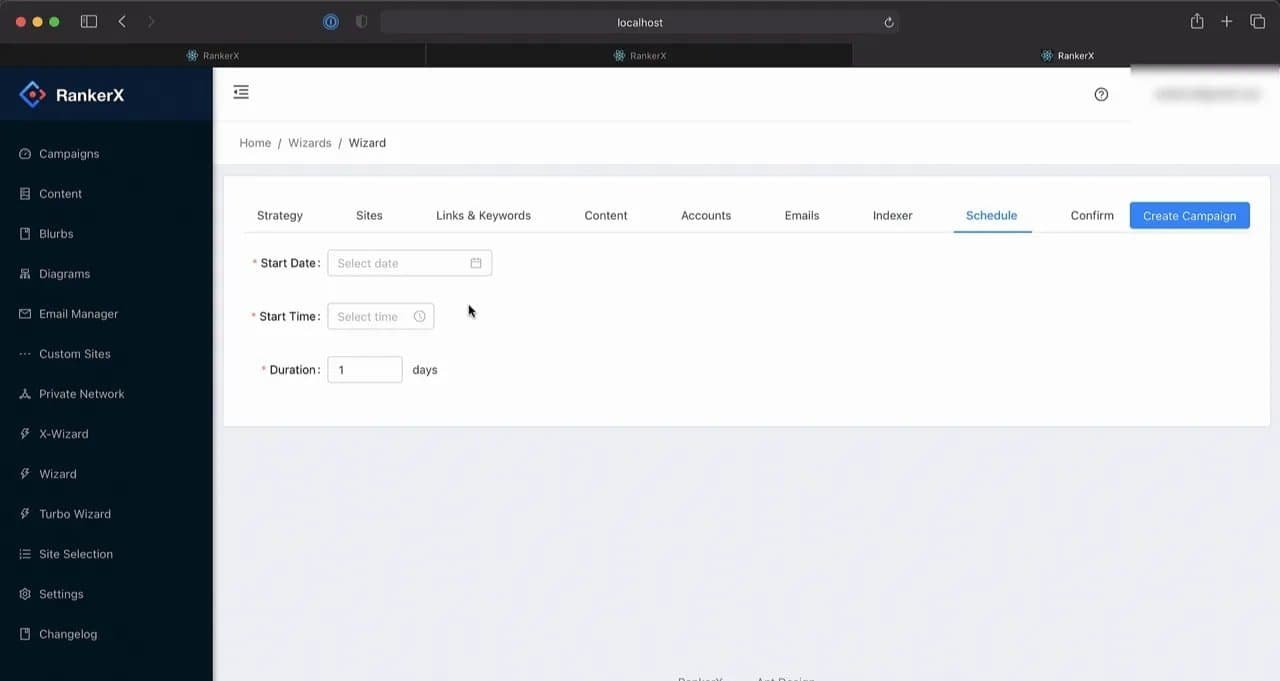
That advice is practical. Large campaigns dumped all at once can be clumsy. A more distributed schedule gives the campaign room to breathe.
If your setup is small and you want results moving now, running it the same day is fine. If it is larger, do not cram everything into a single burst just because patience feels inconvenient.
Step 10: Confirm and Create the Campaign
Go to the Confirm tab for the final review.
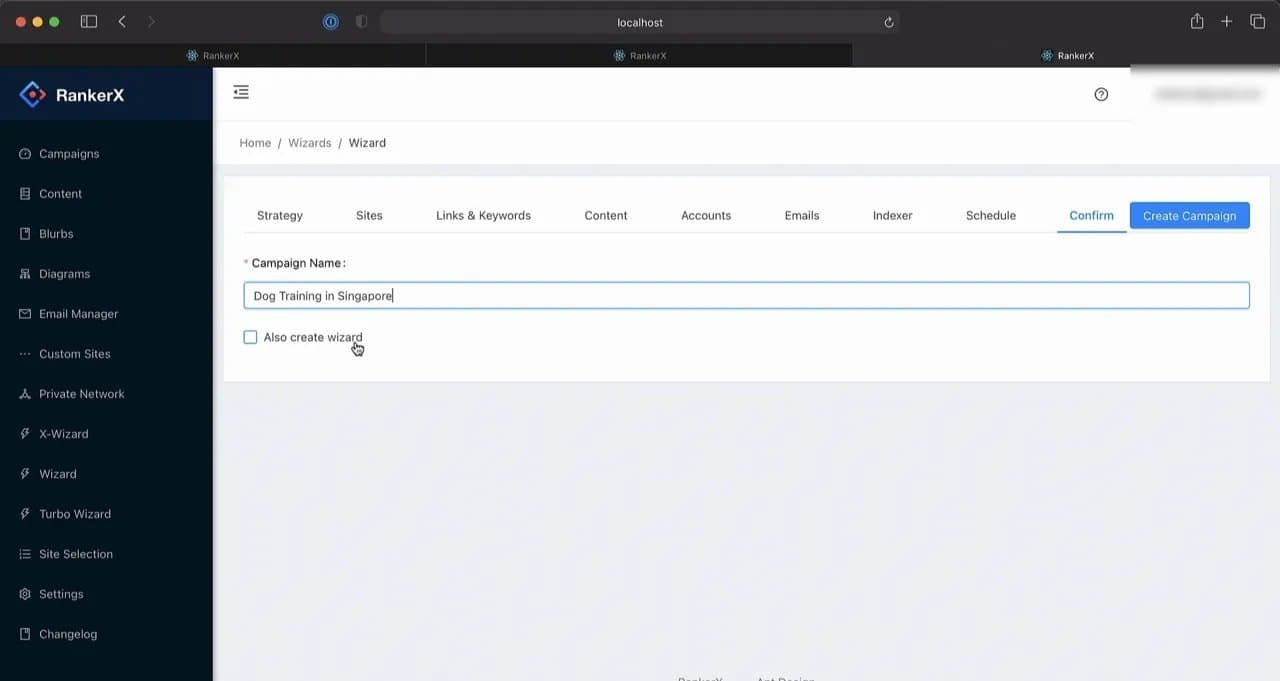
Here you can:
Check the campaign name again
Review the overall setup
Save the X Wizard configuration for reuse later
That last point is underrated. If you know you will be creating similar campaigns again, save the X Wizard setup. Reusing a tested configuration beats rebuilding from scratch every single time.
Once everything looks right, click Create Campaign.
RankerX will then redirect you to the campaign you just created.
What You See After Campaign Creation
Once inside the new campaign, you will see a list of projects.
Each project corresponds to one box in the strategy diagram. That means the visual layout you selected earlier is now translated into operational pieces inside RankerX.
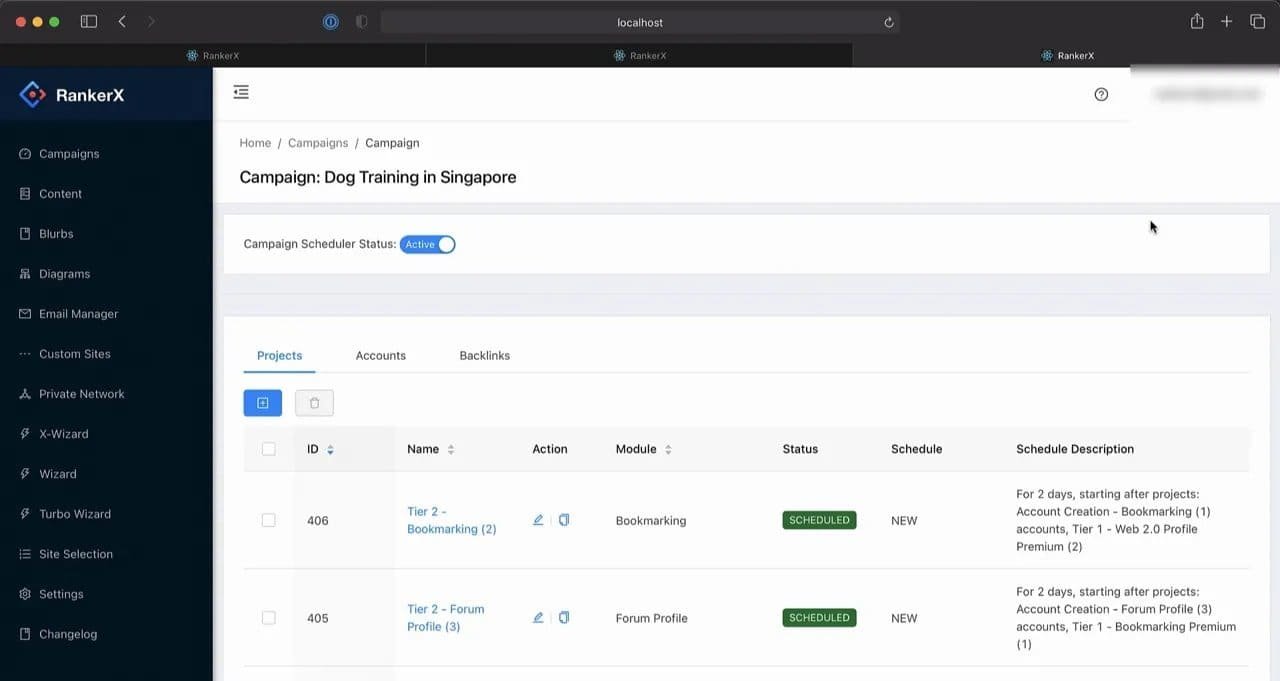
This is one of the more useful parts of the platform because it makes the strategy tangible. The diagram is not just decoration. It becomes the campaign structure.
Where the Accounts Are Stored
Click the Accounts tab inside the campaign.
You will see a list of account profiles. This is where RankerX stores the accounts created or used by the campaign.
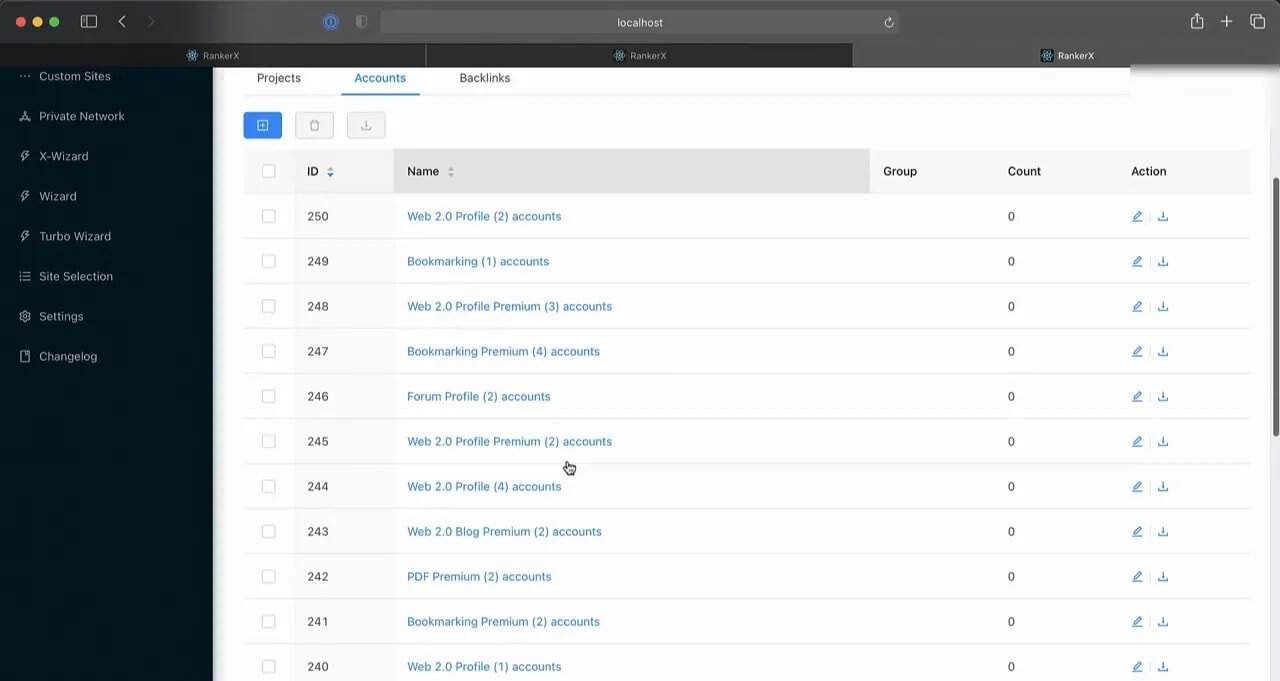
If you ever need to review account creation outcomes, this is the first place to check.
Where the Backlinks Are Stored
Then click the Backlinks tab.
You will see a list of link sets. This is where the backlinks generated by the campaign are stored.
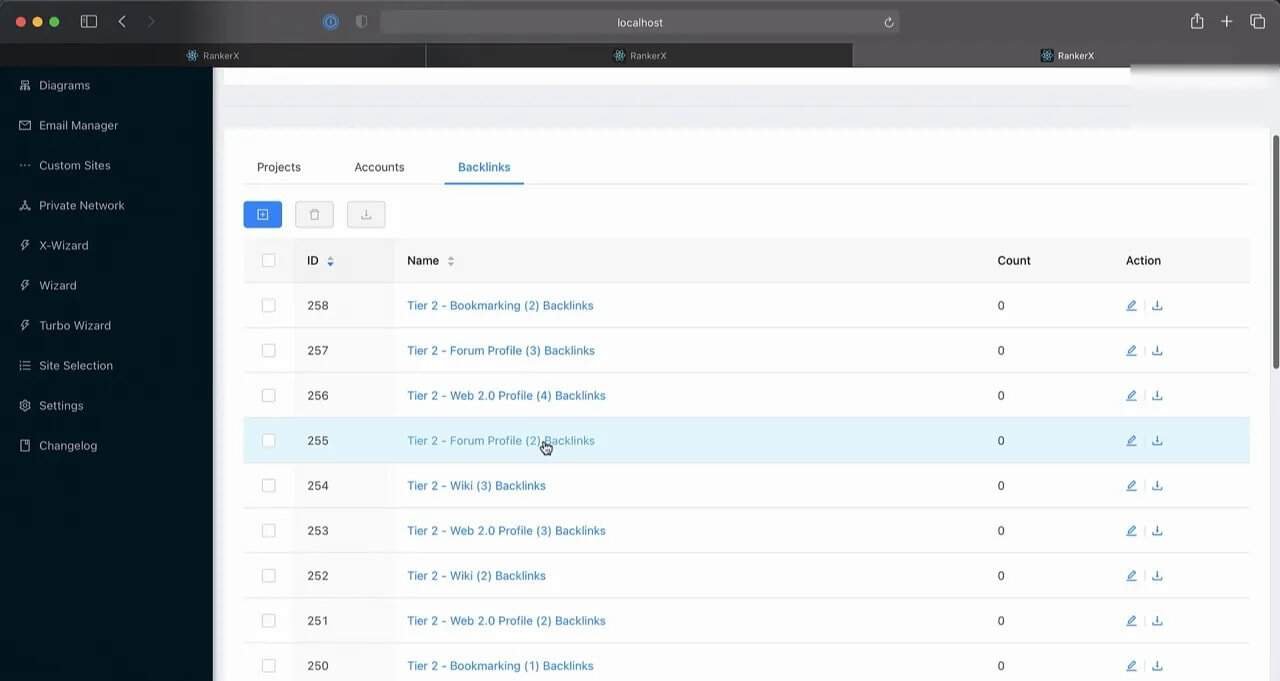
That means once the campaign is running or complete, RankerX gives you clear places to inspect the assets it created:
Accounts tab for account profiles
Backlinks tab for link sets
No scavenger hunt required.
The Smart Way to Think About RankerX
If you strip away all the tabs and toggles, RankerX is really about disciplined setup.
The people who struggle with tools like this usually do not fail because the software is impossible. They fail because they approach it like caffeinated gamblers.
They skip proxies. Ignore CAPTCHA handling. Throw in weak content. Rush keyword input. Forget second-tier settings. Treat scheduling like a coin flip. Then they blame the tool.
Come on.
RankerX rewards sequence:
Prepare settings
Add content
Build the campaign with a strategy
Review projects, accounts, and backlinks
That is the difference between using automation and being used by it.
A Simple RankerX Checklist You Can Reuse
Here is the streamlined checklist for launching a campaign in RankerX without making a mess of it:
Open Settings and configure Proxies if needed
Test proxies and enable Use Proxy
Set up a CAPTCHA-solving service and save it
Create a Content Group
Upload your articles or a ZIP of article files
Create a new campaign from the Campaigns page
Choose X Wizard instead of manual creation
Select a strategy and review the tier diagram
Choose your sites, or use all available sites
Enter money sites, primary keywords, and keyword variations
Keep Replace Keywords as the default link placement option if you want a simple setup
Copy Tier 1 information to Tier 2 if the campaign uses two tiers
Select the content group on the Content tab
Add image keywords or image URLs
Leave account defaults if you do not need custom setup
Use RankerX-provided email accounts for a fast start
Disable indexing if you are not using an indexing service
Schedule the campaign, preferably over 2 to 3 days for larger jobs
Confirm the setup and save the X Wizard if you want to reuse it
Create the campaign and review Projects, Accounts, and Backlinks
Why This RankerX Workflow Works
This process works because it removes friction in the order friction usually appears.
You handle access issues first with proxies and CAPTCHA settings.
You prepare assets next with articles and images.
You build the campaign from a strategy instead of improvising.
You define anchors and tiers before launch.
You keep account and email setup practical.
You schedule intelligently.
Then you create and inspect.
Nothing exotic. Just competent execution, which in digital marketing is apparently rare enough to deserve fireworks.
Final Thoughts on Getting Started With RankerX
RankerX does not need to feel overwhelming. Most of the confusion disappears once you stop trying to do everything at once and start following a logical setup path.
Get the basic settings right. Load your content. Use X Wizard. Fill in the money sites and keyword types properly. Attach images. Keep defaults where defaults make sense. Schedule the campaign based on size. Then check the accounts and backlinks once it is created.
That is how you get moving in RankerX without stepping on the usual landmines.
If your current process for launching campaigns is chaotic, duct-taped, and powered by optimism instead of structure, fix it. RankerX already gives you the framework. You just have to stop treating setup like an afterthought.
FAQ
Do I need proxies to use RankerX?
No. Proxies are optional in RankerX. You can run campaigns without them, but if you plan to create a lot of links, proxies are recommended to improve success rates and help with backlink longevity.
Why should I set up a CAPTCHA-solving service in RankerX?
Many sites used in RankerX rely on CAPTCHAs to block automated submissions. A CAPTCHA-solving service or software helps RankerX get through those steps and keeps the campaign running smoothly.
Can I upload my own articles into RankerX?
Yes. RankerX allows you to upload pre-written article files directly. If you have many files, you can also upload them as a ZIP file to save time.
What is the difference between creating a campaign manually and using X Wizard?
Manual creation gives you full control from scratch. X Wizard uses a pre-created strategy, which makes setup faster and easier, especially when you want a structured campaign without rebuilding every setting manually.
What are Tier 1 and Tier 2 in a RankerX campaign?
Tier 1 sites point directly to your money site. Tier 2 sites point to the Tier 1 properties. The campaign diagram in RankerX shows how those tiers are connected.
What keyword types should I enter in RankerX?
You should enter primary keywords, and also include secondary, branded, and generic keywords. RankerX lets you adjust the percentage of each type to create a more balanced anchor distribution.
How does RankerX place links in articles?
One default method is Replace Keywords. With that option, RankerX searches your article for selected keywords and inserts links at those points.
Do I need to add images to content in RankerX?
You should if you want a more complete article setup. RankerX allows you to provide image keywords for search or direct image URLs.
What email options are available in RankerX?
You can enter your own email account manually, use accounts already stored in Email Manager, or use RankerX-provided email accounts.
Should I use an indexing service in RankerX?
Only if you have access to one and want to use it. RankerX supports multiple indexing services, but you can leave the option disabled if you are not using any.
How long should I spread a RankerX campaign over?
For bigger campaigns, it is recommended to spread the run over at least two to three days. Smaller campaigns can be scheduled for the current day if needed.
Where do I find created accounts and backlinks in RankerX?
Inside the campaign, the Accounts tab stores account profiles, and the Backlinks tab stores the generated link sets.
>> RankerX Review: The Link-Building SEO Software You Need 2026