
Are you really okay with a media library that looks like a junk drawer with Wi-Fi?
If your WordPress uploads are scattered, uncategorized, bloated, and impossible to manage, that old-school approach is not “good enough.” It’s crap. It wastes time, clogs storage, and turns basic media work into a ridiculous scavenger hunt.
Sigma Media Manager is built to fix that mess. It takes the default WordPress media library and turns it into a structured, practical system with smart organization, bulk actions, AI tools, image editing, optimization, and cloud offload support. In plain English, it helps keep your files clean, fast, and easy to find without making you wrestle with a clunky workflow.
This guide walks through how Sigma Media Manager works, what each major feature does, and how to use it to bring some order to your WordPress media chaos.
Getting Started With Sigma Media Manager
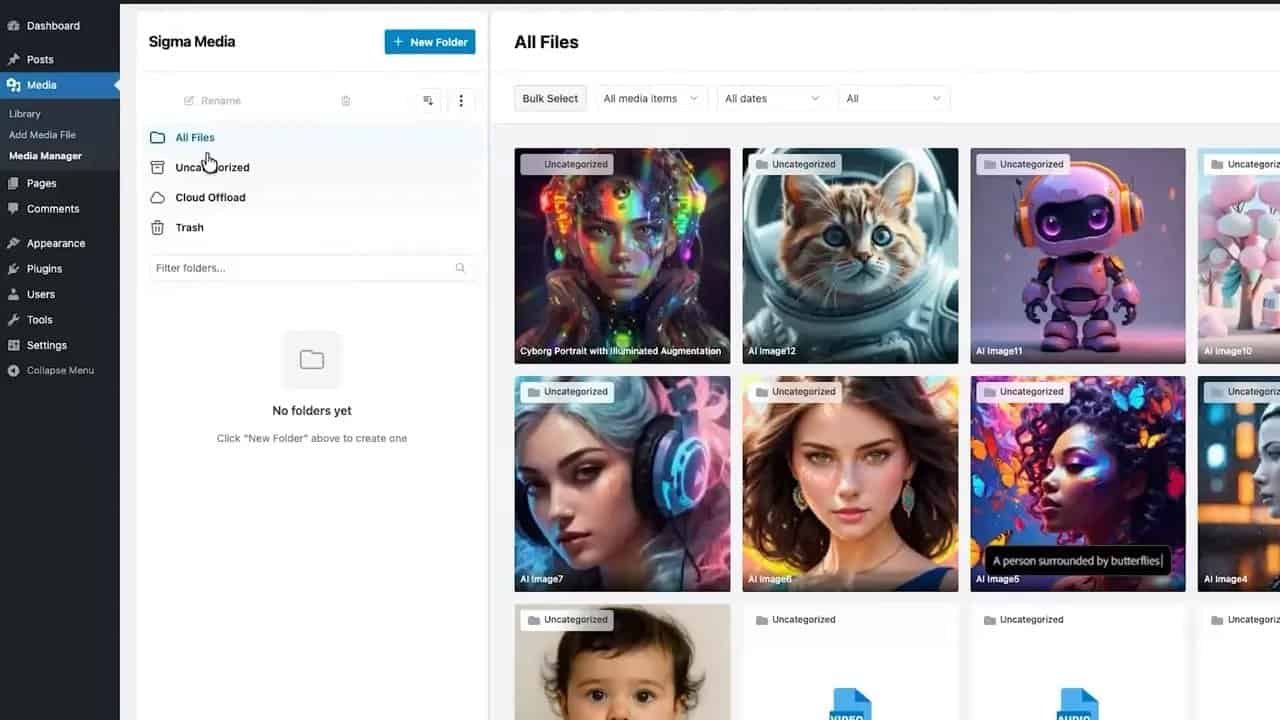
Installing Sigma Media Manager is straightforward. It works like a standard WordPress plugin. Install it, activate it, and then head to the left-hand admin panel under Media > Media Manager.
That opens the Sigma dashboard, where all uploaded media files are displayed and organized into core sections on the left side:
- All Files
- Uncategorized
- Cloud Offload
- Trash
Right away, this makes the library feel less like a digital landfill and more like a workspace that actually respects your time.
Navigating the Media Dashboard
The top area of the dashboard is where Sigma Media Manager starts flexing.
You get a bulk select option for selecting multiple files, or all files at once, so repetitive tasks stop eating your day alive. Next to that are filtering tools that let you sort media by:
- File type
- Date
- Attached or unattached status
There’s also a quick toggle for grid view or list view, depending on how you prefer to browse.
And then there’s one of the standout features: Smart Organize.
Using Smart Organize to Clean Up a Mess Fast
Manual file sorting is fine if you enjoy tedious nonsense. For everyone else, Smart Organize is the obvious move.
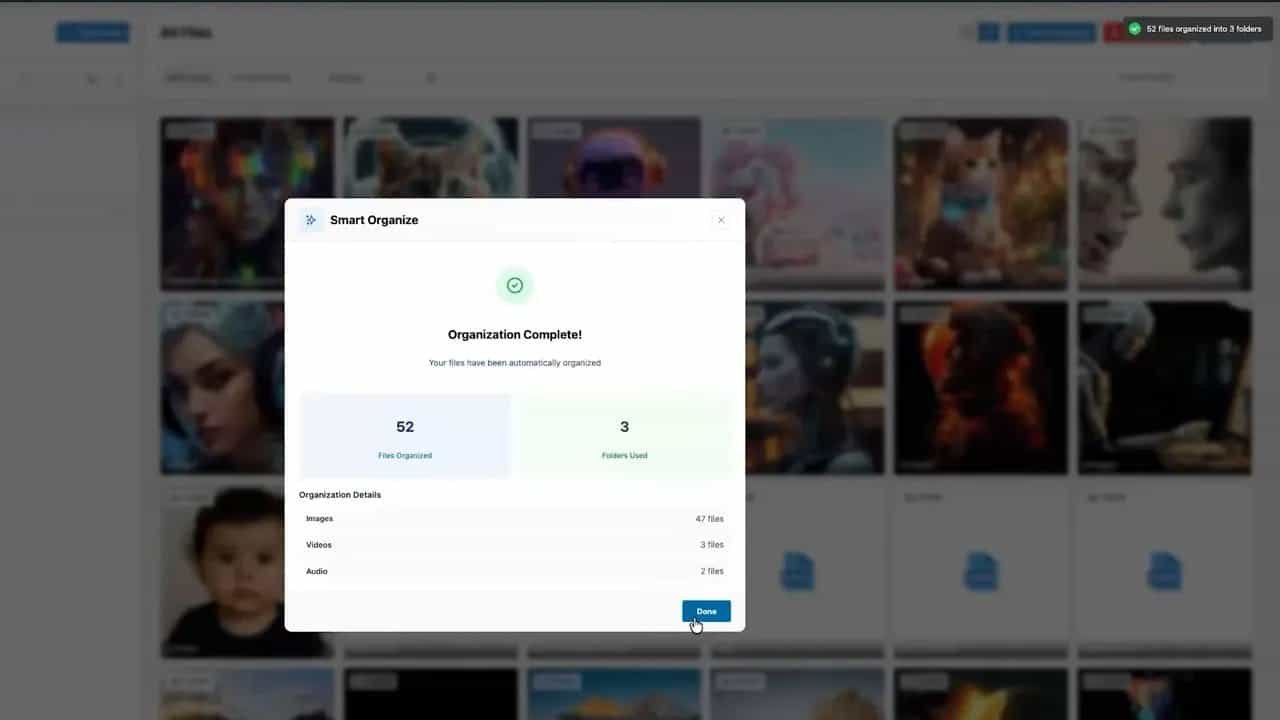
Clicking the Smart Organize button opens a pop-up that shows how your media files will be grouped. Once you confirm by clicking Organize Now, Sigma sorts the files automatically and creates structured folders in the left panel.
When the process finishes, you get a summary and newly generated folders that neatly categorize the library.
That means less hunting, less guessing, and a lot less “where the hell did that file go?”
In the same area, you’ll also find:
- Delete Unused, which scans for media that is no longer being used and removes it to save storage
- Upload, for quickly adding new files
Editing Images Without Leaving the Media Library
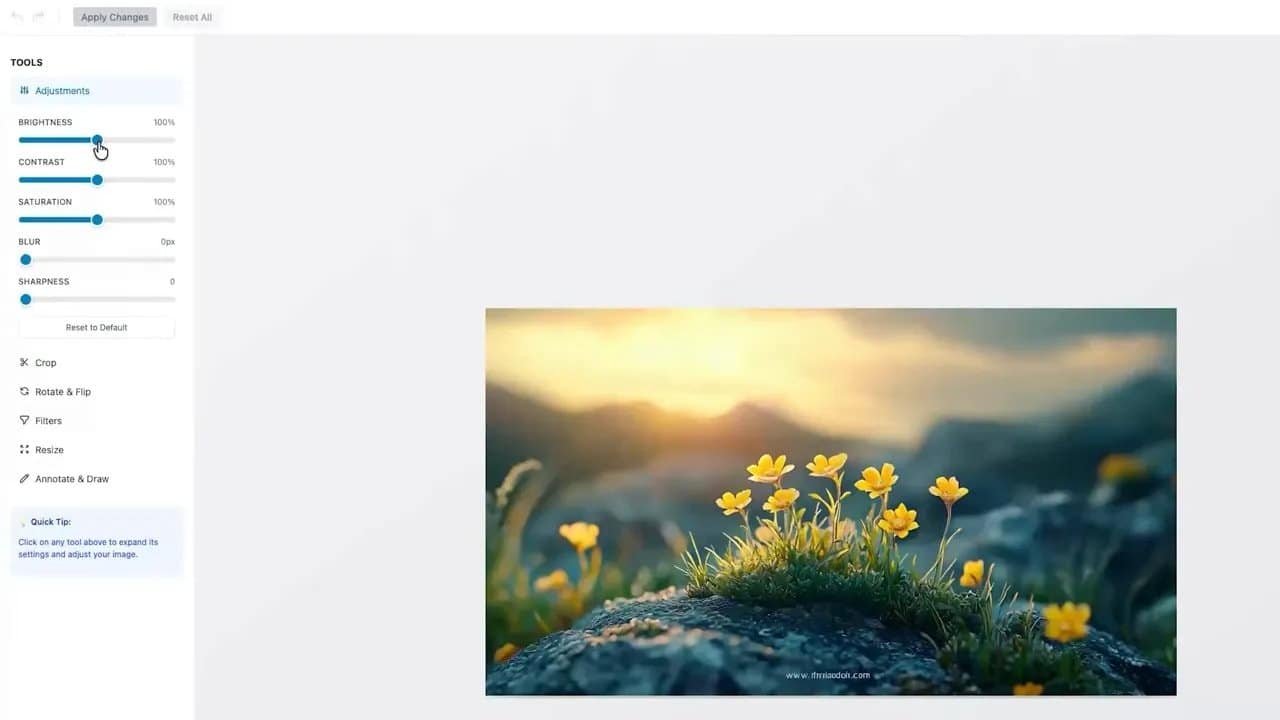
Select any file and open its attachment details. From there, click Edit Image to launch the built-in image editor.
This is where Sigma Media Manager stops being just an organizer and starts acting like a proper media toolkit.
The editor includes controls for:
- Brightness
- Contrast
- Saturation
- Blur
- Sharpness
It also supports direct image operations such as:
- Crop
- Rotate
- Flip
- Apply filters
- Resize
- Draw and annotate
Once edits are complete, click Apply Changes to save them. If you need to back out, Reset All restores the original state of the image.
Folder Management That Doesn’t Feel Like Punishment
Folder management inside Sigma Media Manager is practical and fast.
Right-click any folder and you’ll get options to:
- Create a new folder
- Rename an existing folder
- Duplicate a folder
- Delete a folder
- Change folder colors
- Download files
The top three-dot menu adds more controls, including:
- Expand all
- Collapse all
- Fix broken folders
- Show folder IDs
This is the kind of thing that sounds small until you’ve spent too many hours poking around a bloated library like you’re searching a dark attic with a dead flashlight.
General Settings: Small Tweaks That Make a Big Difference
Open Settings > Sigma Media Manager and start with the General tab.
You’ll find three useful toggles right at the top:
- Enable folder colors for better visual organization
- Show item count to display how many files are inside each folder
- Auto-expand folders to automatically open folders containing subfolders when the page loads
You can also set a default folder color, which gets applied automatically whenever a new folder is created.
After saving, the media manager reflects those changes immediately. Folders become color-coded, item counts appear, and newly created folders inherit your chosen default color.

AI Settings in Sigma Media Manager
Here’s where things get more interesting.
Sigma Media Manager integrates with multiple AI providers:
- Gemini
- OpenAI
- Claude
Each provider requires an API key from its respective platform. Once a provider is selected, you can enable:
- Text generation
- Image generation
You can also set a default tone for AI-generated content, with options like:
- Professional
- Creative
- SEO-focused
- Descriptive
Paste in the API key, click Test Key, and if everything is configured properly you’ll get a success message. Save the settings, and the AI features become available inside the media workflow.
Generating Alt Text, Titles, Captions, and Descriptions With AI
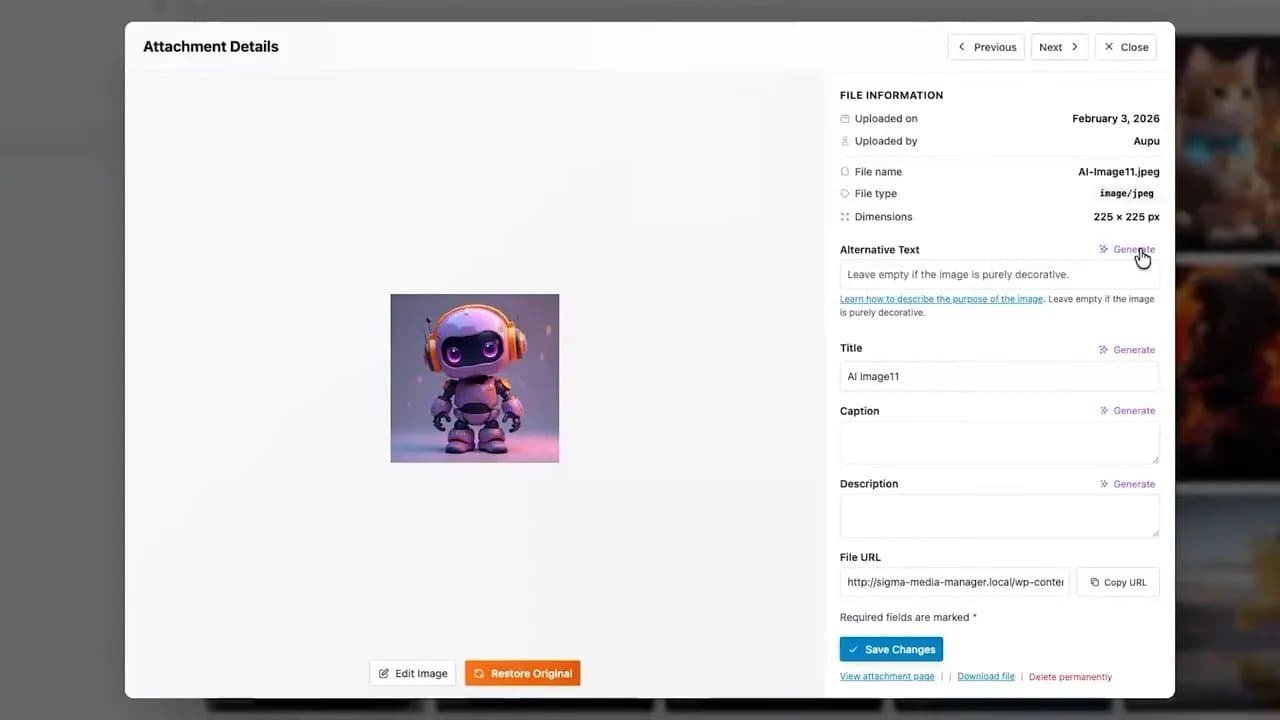
Once AI is enabled, select an image from your library and open the attachment details panel.
You’ll see fields for:
- Alternative text
- Title
- Caption
- Description
Each field includes a Generate option. Click it, and the AI automatically produces relevant text for that field.
This is especially useful when your current media workflow involves “I’ll fill that in later,” which of course means never. And then your library ends up full of filenames that look like keyboard accidents.
AI-Powered Image Enhancement Inside the Editor
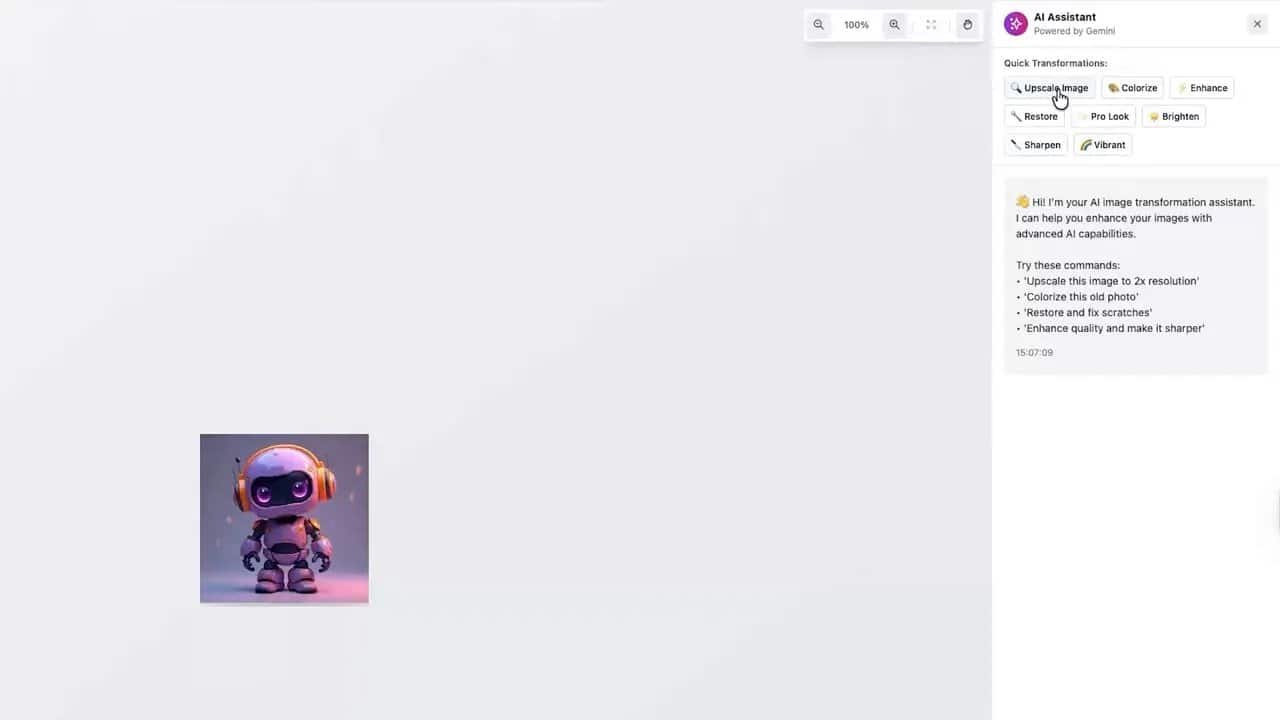
Open the image editor again and you’ll find the AI Assistant in the top-right corner. In the demo setup, this is powered by Gemini.
The assistant includes quick enhancement options such as:
- Upscale Image
- Colorize
- Enhance
- Restore
- Prolook
- Brighten
- Sharpen
- Vibrant
Choose one of these presets and the AI processes the image automatically. For example, Upscale Image improves resolution.
You can also enter a custom prompt. A prompt like “add a rainbow effect” generates an edited version based on that instruction.
When you’re happy with the result, click Save Image. If necessary, the original version can be restored.
Display Settings for a Cleaner Workspace
The Display tab controls how the media library looks and feels.
Here you can set:
- Grid or list view as the default
- Number of items per page
- Thumbnail sizes
- File size display
- Upload date display
- Sidebar width
These settings are simple, but they matter. A badly arranged interface chips away at your focus like death by a thousand dumb clicks. A cleaner layout makes browsing and managing media noticeably easier.
Image Optimization and Compression
The Optimization tab is all about performance and storage efficiency.
Enable image compression and you’ll unlock several controls:
- Auto-compress images on upload
- Keep original files as backups before compression
- Adjust compression quality
- Resize large images before they become oversized problems
- Strip EXIF metadata to reduce file size
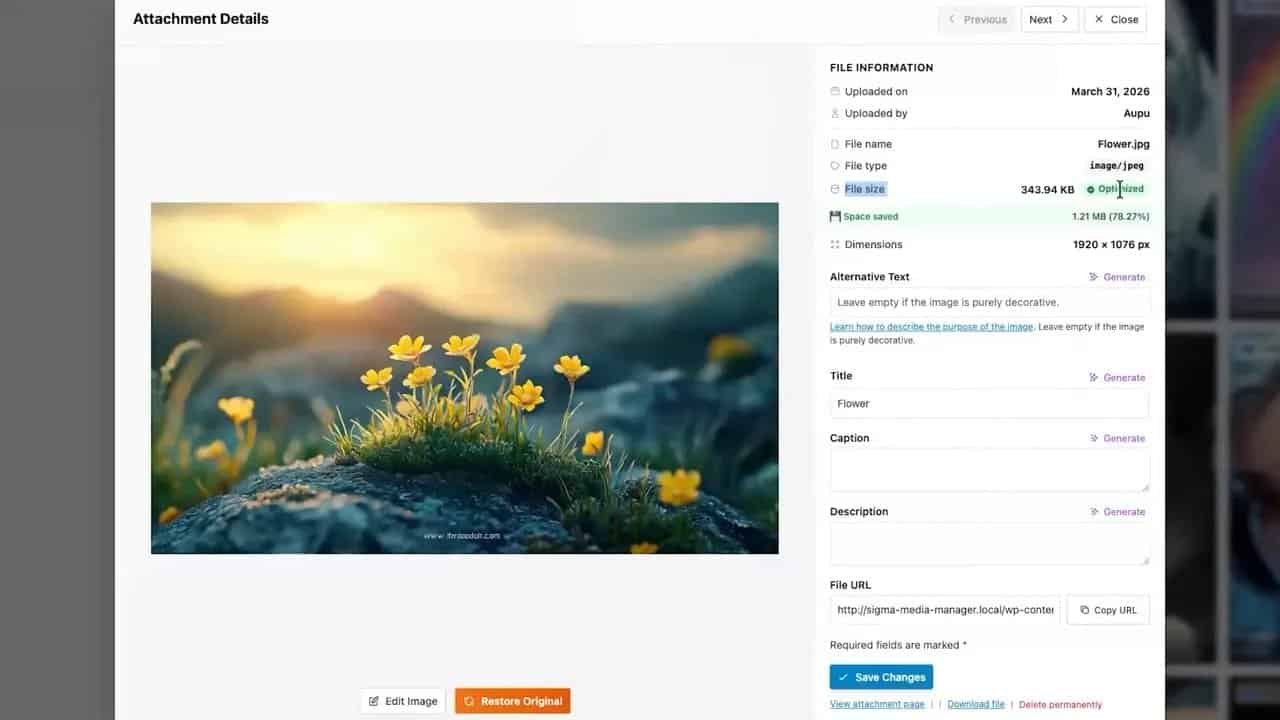
Save those settings, then return to the media manager and select any image. In the file details panel, you’ll see size information on the right-hand side. At the bottom, click Optimize Image.
After a short wait, the image is optimized, often saving a meaningful amount of storage space.
That matters more than people admit. Bloated images drag performance down, chew through storage, and make your site work harder than it should. Leaving them untouched is like hauling bricks in your backpack and pretending it builds character.
Cloud Offload: Move Media Out of Your Server Storage
One of the strongest features in Sigma Media Manager is Cloud Offload.
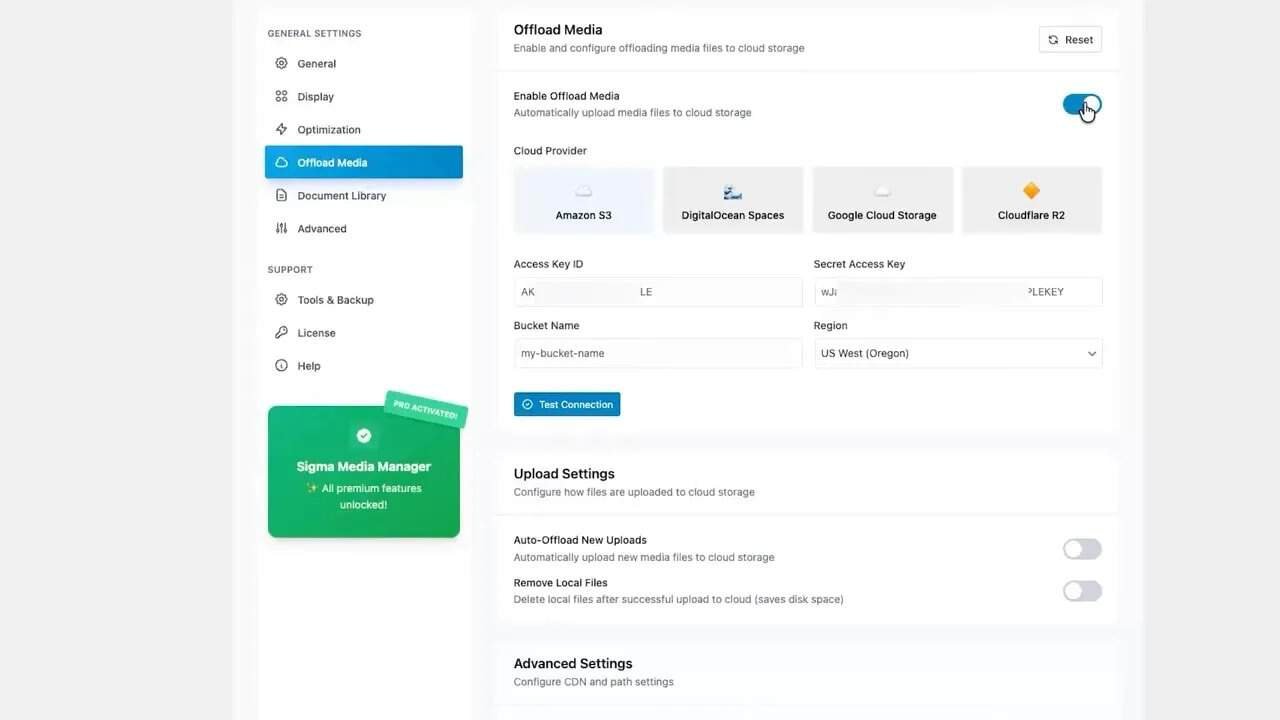
Open the Offload Media tab in settings and enable the feature. Once active, you can connect one of four supported cloud providers:
- Amazon S3
- DigitalOcean Spaces
- Google Cloud Storage
- Cloudflare R2
For example, if you select Amazon S3, you’ll need to enter:
- Access Key ID
- Secret Access Key
- Bucket Name
- Region
Then click Test Connection. If the configuration is valid, you’ll get a confirmation message.
Below that are additional settings for:
- Upload behavior
- CDN configuration
- File path options
How Cloud Offload Works in Practice
After setup, return to the media manager and open the Cloud Offload tab.
Initially, it may be empty. Upload a new media file and, once the upload completes, a small cloud icon appears on the media item to indicate that it has been successfully offloaded.
Switch back to the Cloud Offload tab and the file will appear there as well.
Selecting that file reveals additional options in the top-right corner for managing cloud media as needed.
That’s a serious upgrade if your current strategy is “keep everything on the server and pray.”

Document Library Controls
The Document Library tab lets you control how documents are handled within the media library.
Enable the feature toggle to unlock the available options, then adjust them according to your workflow.
The demo focuses on the fact that this section exists and can be customized, giving you more control over how non-image files are managed inside Sigma Media Manager.
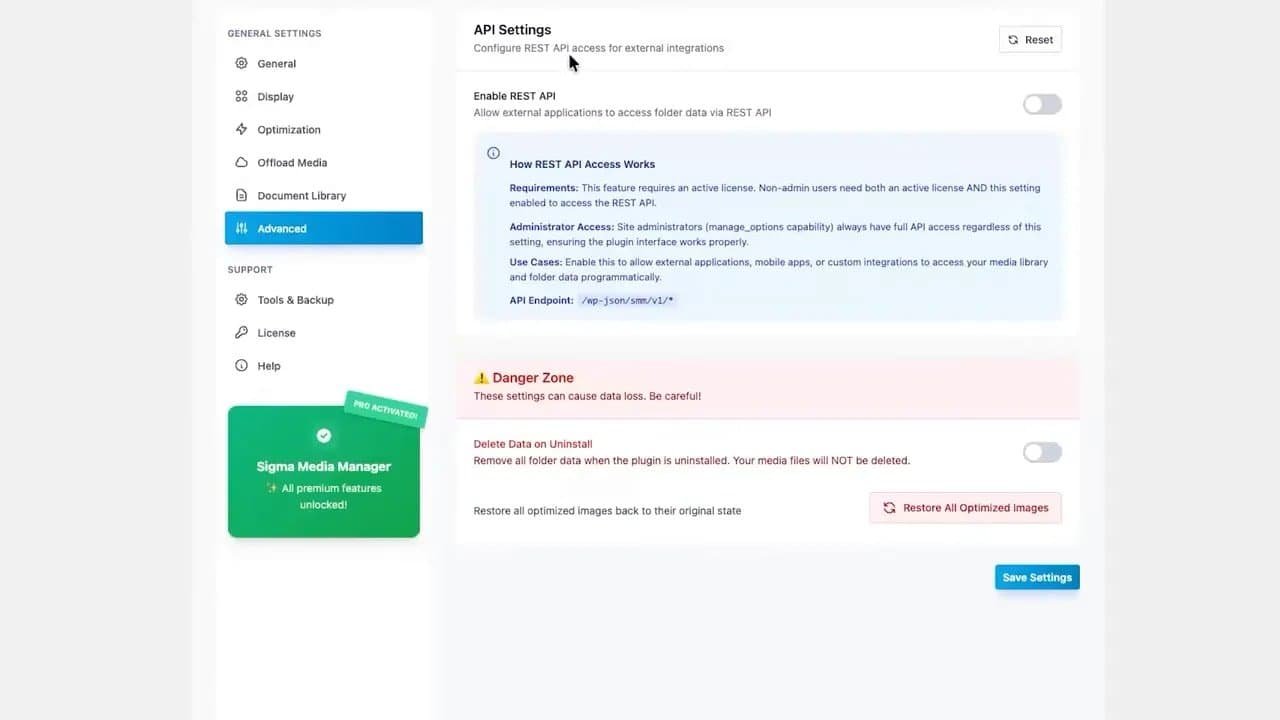
Advanced Settings, Tools, and Backup Options
The Advanced tab includes a couple of practical admin controls.
First, you can enable REST API access for external integrations, allowing third-party applications to interact with media folders.
Second, there’s a Danger Zone option that lets you delete all plugin settings on uninstall. This removes folder structures and settings, while keeping your actual media files safe.
Under the support area, Tools and Backup lets you:
- Export settings
- Import settings
- Reset settings
You’ll also find:
- License details in the License tab
- System info, documentation, and support links in the Help tab
Why Sigma Media Manager Stands Out
Plenty of sites limp along with a default media library and call it a workflow. That dinosaur of an approach is as effective as trying to text on a typewriter.
Sigma Media Manager stands out because it combines the essentials and the advanced tools in one place:
- Smart folder organization
- Bulk actions and filters
- Built-in image editing
- AI-generated metadata
- AI image enhancements
- Compression and optimization
- Cloud storage offload
- Display and document controls
- Backup and integration settings
It’s built to make WordPress media management faster, cleaner, and less painful. No bloated routine. No endless file hunting. No unnecessary manual grunt work.
Final Thoughts
If your media library is disorganized, oversized, and full of neglected files, that’s not a harmless little inconvenience. It’s a workflow leak. It drains time, storage, and patience.
Sigma Media Manager gives you the tools to fix that with smart organization, practical editing controls, AI-powered assistance, image optimization, and cloud offload support.
In short, it turns your WordPress media library from a cluttered mess into something structured, efficient, and actually usable.
You can keep babysitting a chaotic file system like it’s 2012, or you can clean the whole thing up with Sigma Media Manager and get back to work.